How To Install Your Ivyel Water Ionizer
Water Ionizer Installation Guide
The Ivyel water ionizer can be installed using one of two methods: connecting to the faucet or connecting directly to the cold water tap under the sink.
1. Connecting to the Faucet: Attach the included adapter directly to the faucet. This method works with standard faucet spouts but not with shower-type faucets.
2. Connecting Under the Sink: Attach the included adapter to the cold water valve under the sink. The included adapter is of a standard size. However, if your under-sink water valve is 3/8”, please contact our support team and we will send you the appropriate adapter. Note: For detailed installation instructions, please refer to the video below.
Post-Installation Instructions
After installation, drain the water for about 3 minutes with the water setting on “purified” before use. It is normal for black water to come out initially due to the activated carbon content in the filter. You can start consuming the water after allowing it to flow through the machine for about 3 minutes.
Helpful Tips
Always use the correct adapters for your specific faucet or water valve. Regularly test and adjust pH levels to ensure optimal performance and water quality. Consult the provided videos for comprehensive guidance on installation and settings adjustment.
For models PL and DL
If you have a standard sink faucet, you can choose to install the water ionizer to your sink faucet by simply adding a faucet adapter. This installation is ideal if you do not have a hole in your countertop.
For models PL and DL
Installing under the sink requires a standard 1-3/8" diameter hole on your countertop. The adapter we provide is the most commonly used 1/2" adapter. If your sink requires a 3/8" adapter, simply reach out to us and we will send you the appropriate adapter.
For models PL and DL
Learn how to install the PL-MAX in this step by step video tutorial. Installation requires a 1.25" diameter hole on your countertop.
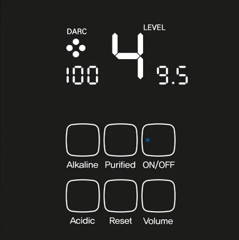
After installing the machine, open the adapter connected to the main water supply to adjust the flow rate.When the handle of the adapter is aligned with the hose, the flow rate increases. When it is at a right angle to the hose, the flow rate decreases.The flow rate is displayed on the machine's monitor in liters per minute (e.g., 2.0: 2.0 liters/min).
The maximum flow rate is 3.0 liters/min.Set the appropriate flow rate between 2.0 to 2.5 liters/min.
If the flow rate is below 1 liter/min, remove the water regulator that is connected to the white hose.
If the flow rate drops below 0.5 liters/min, a warning voice will announce "Purified water level is low."
When installing the PL-MAX Faucet, if you connect the faucet to the machine body, the screen on the machine body will not display.To check the flow rate, after installing the machine, disconnect the adapter connecting the PL-MAX Faucet to the back of the machine body. Let the water flow, and check the flow rate on the display screen of the machine body.Once the flow rate is adjusted to the appropriate level, reconnect the PL-MAX Faucet adapter to the back of the machine body.